loader

Keyframing allows you to add dynamic motion and effects to your videos by controlling various parameters over time, creating seamless animations and transitions. Here’s how you can add keyframes in illusto:

  1. Arrange Your Clips: Begin by dragging and dropping your video clips onto the timeline in your desired sequence.
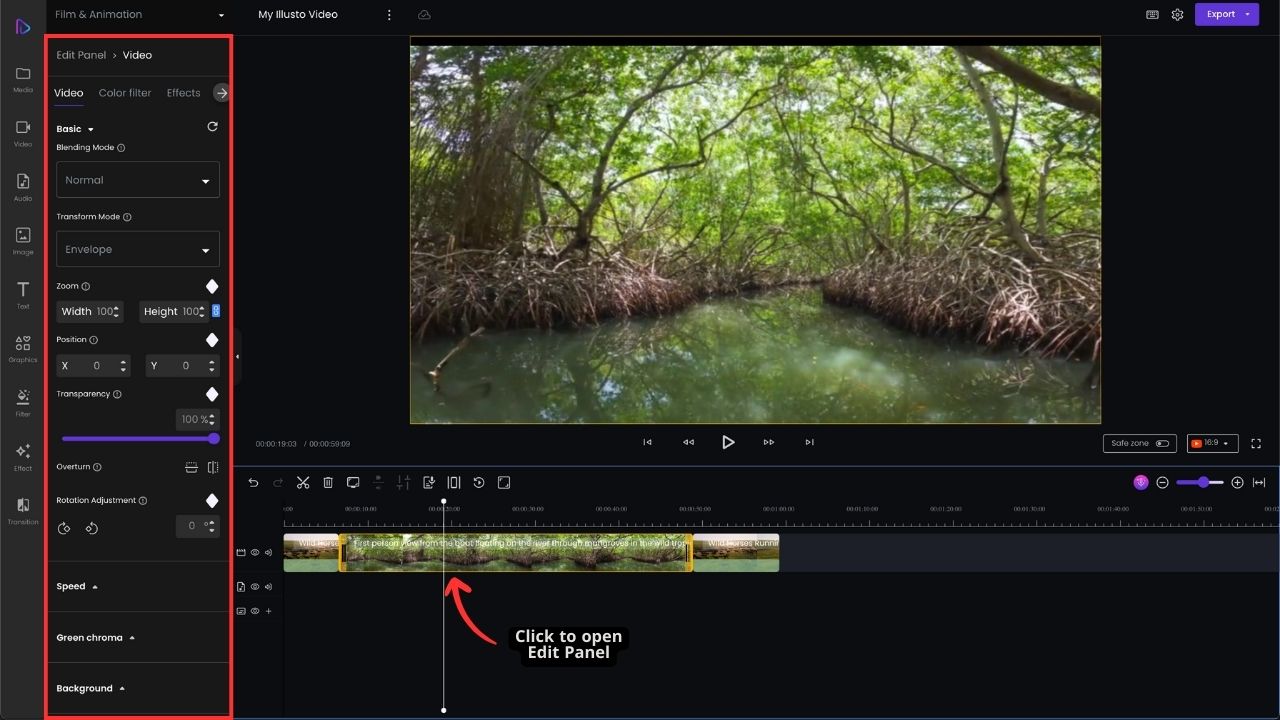
  2. Open Basic Settings: Click on a video clip in the timeline to open the Edit Panel.

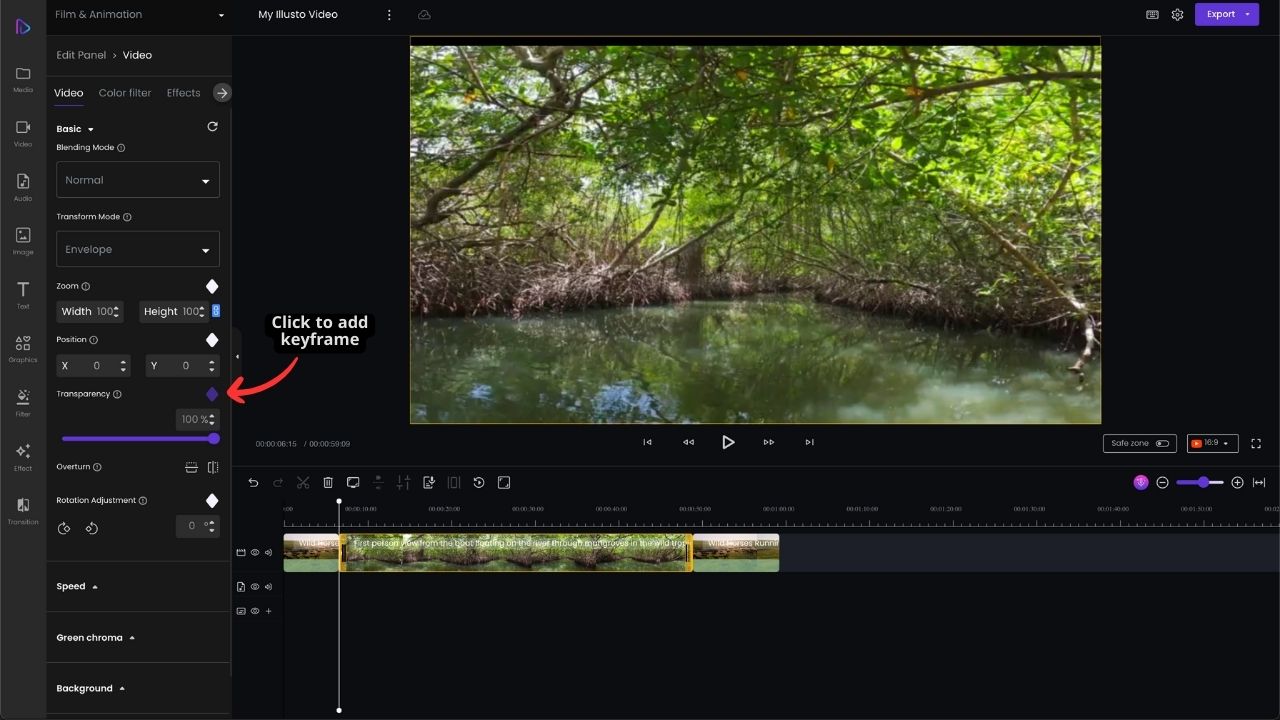
3. Exploring Keyframe Options: In the basic video settings, you’ll find keyframe options available for Zoom, Position, Transparency, and Rotation Adjustment.

4. Illustration: Let’s focus on transparency adjustment for this tutorial. Navigate to the “Transparency” option.

a. Set Initial Transparency: To start keyframing, set the initial transparency value for your video clip at the desired point on the timeline.

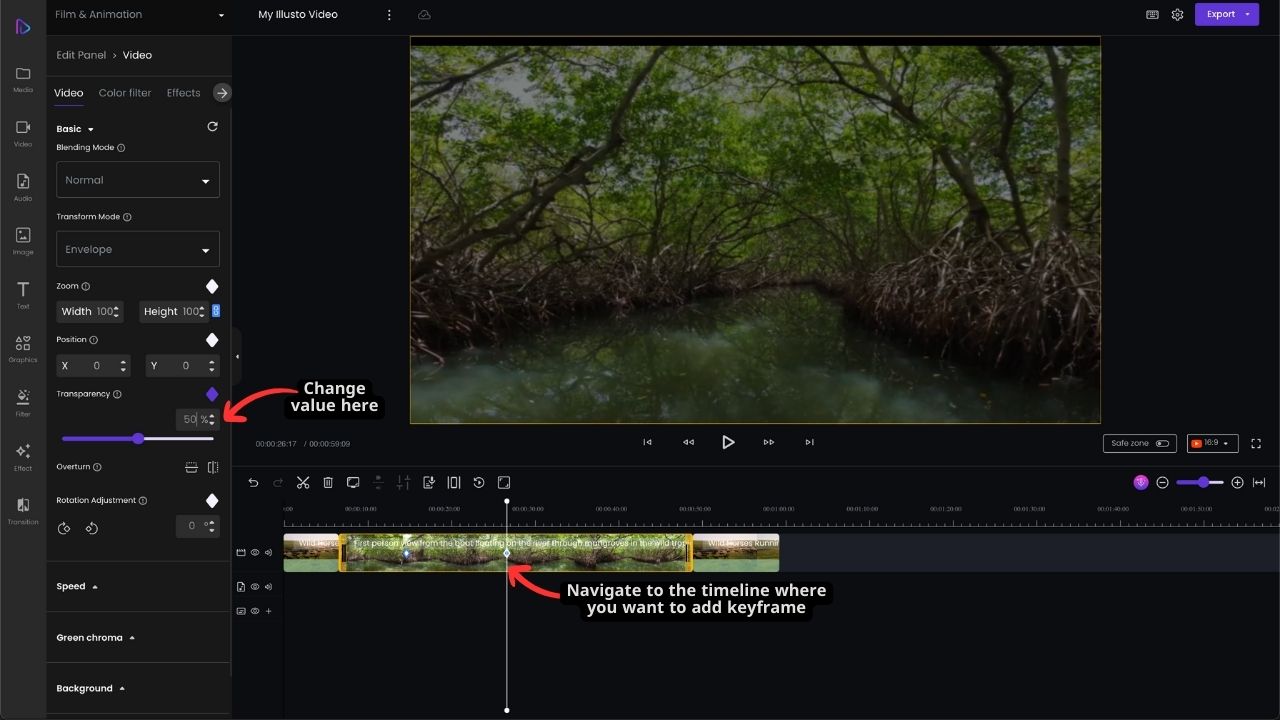
b. Adding Keyframes: Move along the timeline and add keyframes at different time points where you want to change the transparency.

c. Adjusting Transparency: Modify the transparency in each keyframe to create a smooth and gradual fading effect.

5. Fine-Tune and Experiment: Adjust the placement and values of keyframes to achieve the desired effect. Experiment with different transparency values.

So whether you’re aiming to add subtle animations or dramatic transformations, mastering keyframes allows you to tell your visual story with perfection. Should you require additional guidance or support, our Help Center is a valuable resource, and our dedicated support team is readily available to assist you. Feel free to reach out to us for any inquiries or clarifications.

Was this article helpful?

image Yes
image No

Related Articles

Adding auto subtitles to your video

Greenscreen editing on illusto

Masking or blurring a video on illusto